

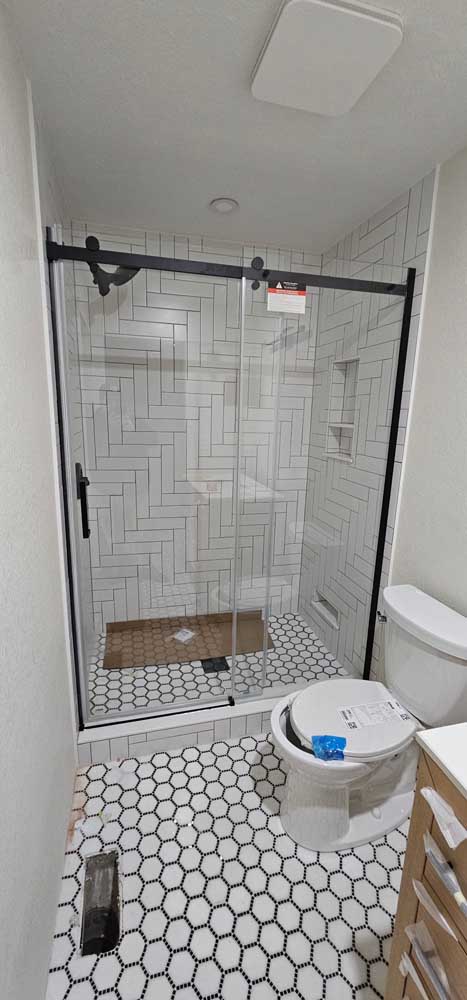
I want the shower to work with wet feet, an open door and a towel in your hand. A showroom photograph cannot test that.DT · Owner, BH Builders
 I understand why homeowners ask for a curbless shower. The room feels more open, the entrance is easier to navigate, and one continuous floor can look calm instead of chopped into little pieces. But the first thing I want to inspect is below that floor. A successful curbless shower needs room for its drainage assembly and slope, a supported substrate, a continuous waterproofing plan and a layout that keeps ordinary splashing under control.
This is a planning guide for Denver-metro homeowners, not a set of do-it-yourself structural instructions. I would have the actual floor assembly, plumbing and permit requirements reviewed for your property. The worked example is illustrative. It explains the choices in a typical constrained room without pretending that every bathroom has the same joists, drain location or construction history.
Start with the floor depth you really have
 The shower floor must direct water toward a drain while meeting the surrounding floor at the entrance. That geometry takes space. In an existing wood-framed floor, the available depth depends on joists, subfloor, ceiling below and the selected shower system. In a slab, relocating or lowering drainage raises a different set of questions. I would investigate those conditions before promising a perfectly flush transition.
Do not let someone casually notch or cut structural framing to make a showroom detail fit. A structural professional may need to design the recess or an alternate assembly. Raising the surrounding bathroom floor can sometimes be part of a solution, but it moves the transition to the doorway and can affect doors, fixtures and adjacent rooms. I want those consequences drawn, not discovered after tile is ordered.
Choose the drain with the tile and floor geometry
 A linear drain and a point drain create different floor layouts. The choice affects slopes, tile cuts, cleaning access and where plumbing needs to go. I would compare complete assemblies, including the connection between drain and waterproofing. Buying the most attractive grate first can lock the project into a detail that is difficult to build in the existing floor.
Consider how the drain is maintained. Can its cover be lifted? Can hair be removed without disturbing glass or a bench? A drain at the far wall may produce a clean appearance, but the plumbing route and available depth still have to work. The Schluter shower waterproofing range illustrates how drains, corners and membranes are coordinated components. The actual installation must follow the selected manufacturer's current system instructions.
| Decision | What it changes | What I would verify |
|---|---|---|
| Point or linear drain | Slope pattern and tile cuts | Complete drain-to-membrane connection |
| Recessed shower floor | Structure and ceiling below | Designed support and available depth |
| Raised bathroom floor | Doorway and fixture heights | Transition to adjoining rooms |
| Open entry | Splash exposure | Head direction and usable dry area |
Treat waterproofing as a continuous assembly
 Tile and grout are the finish you see. I want to know what manages water behind and below them. The critical locations include floor-to-wall corners, drain connections, pipe penetrations, niches, benches and the entrance to the shower. A product label by itself does not explain how all those locations connect. Ask for the waterproofing system and its installation details to be identified in the scope.
Mixing components without checking compatibility can create uncertainty about both performance and warranty. I would also discuss inspection and testing before finishes cover the work. The schedule needs time for whatever preparation, cure and testing the selected assembly requires. “We will seal the grout afterward” is not a substitute for a waterproofing design, and a beautiful tile pattern cannot repair a missing connection underneath it.
- Identify the membrane or approved waterproof assembly.
- Confirm how the drain connects to that assembly.
- Show treatment at corners, penetrations and the entry.
- Specify the substrate preparation and inspection sequence.
- Keep product records and photographs before tile covers the work.
Lay out the shower around the water path
 A curbless entrance does not automatically mean a doorless shower. In a compact bathroom, glass or a door may be the most comfortable way to keep towels, toilet paper and the vanity dry. I would look at the showerhead direction, handheld use, entrance location and distance to the dry side. A rainfall head can still create splash when water hits a person, bench or floor.
Think through ordinary movements. Where do you stand while adjusting the temperature? Can you reach the controls without stepping fully into cold water? Where does the towel hang? If a door is used, does it conflict with a toilet or vanity? These questions belong in the layout stage. A larger opening is not automatically better if it sends water directly into the route between the toilet and sink.
Select a floor for wet use and maintenance
 I would handle actual samples before choosing the floor. Surface texture, grout joints, cleaning needs and how the material feels underfoot all matter. A tile that looks understated in a showroom may feel rough to someone who prefers to sit while showering. A highly polished surface deserves careful consideration in a wet walking area. Ask the manufacturer about the product's intended use and limitations.
Large tiles can reduce grout joints, but they must work with the slope geometry. Smaller tiles may fit a multi-directional slope more easily, while increasing the amount of grout to maintain. Neither answer is universal. I would choose the drain, tile format and layout together, then review a drawing of cuts at the entrance and walls. That is where a supposedly simple continuous floor can become visually awkward.
Plan for the way you may use the room later
 Aging-friendly planning starts with more than removing a curb. Space to turn, a comfortable seat, reachable controls, lighting and useful support locations can matter just as much. I would discuss future needs openly without assuming that one layout serves every body or mobility aid. Where accessibility dimensions are required, the designer must identify the applicable standard and verify the complete room.
Blocking for future support hardware is worth discussing while walls are open. Record its location with measurements and photographs. A decorative towel bar should never be treated as a support rail. Also consider whether a handheld shower can be reached from a seat and whether controls can be operated comfortably. The bathroom remodeling guide explains the broader renovation scope; this conversation makes the details personal to the household.
- Describe present users and likely future needs.
- Sketch the entrance, standing area, seat and controls.
- Check support locations and structural backing.
- Review glass, door movement and towel access.
- Confirm the whole-room layout before ordering fixtures.
Work through a compact bathroom example
 Imagine an illustrative Littleton bathroom where an existing tub sits beside a vanity and the homeowner wants an open curbless shower. The initial idea is to remove the tub and leave the opening completely unobstructed. I would first inspect the floor and drain route, then draw the showerhead, entry and vanity on the same plan. If the shower sprays toward the opening, the dry area may disappear during normal use.
A fixed glass panel might improve splash control while preserving an open entrance. A different control location might let the user start the water from outside. If the floor cannot be recessed without substantial structural work, a low-threshold option may be worth comparing alongside the flush design. That is not a failed project. It is a useful choice between construction impact, access needs and budget.
 I would price those options before demolition and explain what each includes. A homeowner can then decide whether the visual continuity is worth the additional floor work or whether a modest transition meets the practical goal more comfortably.
Check performance before calling the room finished
The final walkthrough should include water, not just a visual inspection. Following the installer's commissioning process, verify drainage, control operation, glass movement and the intended splash boundary. Review cleaning instructions for the drain and finish materials. Ask which sealants require maintenance and which cleaners the manufacturer permits. These details protect the work long after the installation crew leaves.
- Confirm required inspections and installation records.
- Review the completed waterproofing and drain documentation.
- Operate the shower and inspect the dry-area boundary.
- Check access to the drain cover and serviceable parts.
- Keep care instructions and a contact for follow-up adjustments.
 Bring photographs and rough dimensions when you contact us about a Littleton bathroom or another Denver-metro home. I can help you identify which questions need an on-site inspection and which selections can wait. Review our remodeling pricing guide and permit guide, then call (720) 980-3913. A comfortable shower begins with a buildable plan beneath the tile.
Keep reading from the BH Builders blog
A flat-looking entrance still needs a carefully built slope. The water has to know where to go even when you cannot see the transition.DT · Owner, BH Builders
Planning a project of your own?
Free, no-pressure estimates across the Denver metro — and four instant calculators.
📞 Call (720) 980-3913 Schedule a Free Meeting